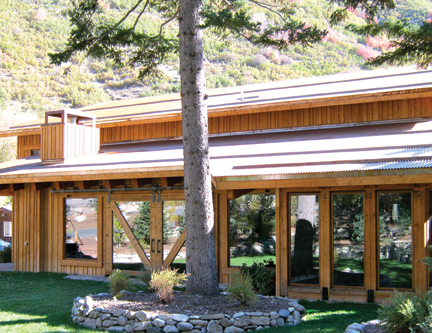
Typically composed of a layer of EPS, XPS, or polyurethane foam sandwiched between oriented strand board panels, structural insulated panels can provide R-values for walls, floors, and roofs ranging from 14 to 58, depending on the panel thickness and composition. SIPs also are manufactured to spec, which can result in reduced waste and potential labor savings.
First-time users may find working with SIPs somewhat worrisome, so we asked Frank Kiesecker, of SIP manufacturer ACH Foam Technologies, Denver, to provide some prescriptive advice that even experienced SIP users could benefit from.
1. Pre-plan electrical and equipment needs. Since SIPs are manufactured to meet the project’s specifications, it’s important to plan for electrical chases in advance to prevent time-consuming and sometimes costly modifications during installation. For example, SIP facings should never be cut horizontally for the installation of electrical wiring; doing so will compromise structural performance.
In addition, during the design phase, it’s important to determine whether there are any equipment needs for the installation of the panels. If the project specifies roof panels or wall or floor panels larger than 8x8 feet, a forklift or crane may be required for installation.
2. Organize the panels for installation. Proper storage, weather protection, and handling will make the installation process more efficient. Store the panels on a level space, no closer than three inches to the ground. Organize the panels by the sequence in which they will be installed (i.e., separate the first-floor panels from the second-floor ones), and make sure they’re covered with a breathable protective tarp to keep them dry.
3. Install the panels properly and seal them tight. SIPs need to be fully supported during installation. The panels slip over a wall plate, which needs to be set half an inch from the building edge to ensure that the panels are fully supported. Also, make sure to set the panels in place in the correct order: start in the corners or valleys and work outward. Once installed, all panel joints and voids must be properly sealed using adhesive or SIP tape to minimize air leakage and maintain the structure’s long-term durability.
4. Protect SIPs from water penetration. Once SIPs have been installed and sealed, weather protection such as housewrap is required to prevent moisture deterioration. Follow the housewrap manufacturer’s installation guidelines, and make sure to flash all penetrations. Over time, windows will leak some water at the sill. Use flashing under and around the units to direct water away from the wall structure.
5. Right-size your HVAC system. One common mistake, says Kiesecker, is underestimating the high insulating and air-sealing properties of SIPs when selecting an HVAC system. SIPs allow for smaller HVAC equipment. When working with an HVAC contractor, make sure they take into account an estimate for lower levels of air infiltration. Proper HVAC sizing is critical because an underused system will fail to reach a steady operating rate, resulting in short cycling, which is less energy efficient and requires more maintenance.
Other important factors to consider when determining HVAC sizing:
- Size of the structure (each floor should be analyzed individually)
- Orientation of building
- Type of wall construction, and associated R-value
- Window and door specs, including the number of windows and doors and their location, insulation value, and fenestration rating
- Duct location (i.e., in heated space, unheated space, attic, crawl space, etc.)
- Amount of air infiltration.
SIPs Do’s and Don’ts
|
Related Stories
| Oct 11, 2011
Pink light bulbs donated to Society of Memorial Sloan-Kettering Cancer Center
For every Bulbrite Pink Light Bulb that is purchased through the Cancer Center Thrift Shop, 100% of the proceeds will be donated to help support breast cancer research, education, screening, and treatment.
| Oct 11, 2011
ThyssenKrupp elevator cabs validated by UL Environment
The conclusive and independent third-party validation process is another step toward a green product line.
| Oct 11, 2011
Ballard Spahr launches real estate recovery group
The new group represents an expansion of the company’s Distressed Real Estate Initiative, which was launched in 2008 to help clients throughout the country plan, adapt and prosper in a challenging economic environment.
| Oct 11, 2011
Onex completes investment in JELD-WEN
With the completion of the JELD-WEN investment, Onex Partners III is approximately 40% invested.
| Oct 7, 2011
GREENBUILD 2011: Demand response partnership program announced at Greenbuild 2011
Program will use USGBC’s newly revised LEED Demand Response credit as an implementation guideline and leverage its relationships with the building community to foster adoption and participation in existing utility and solution provider demand response offerings.
| Oct 7, 2011
GREENBUILD 2011: Otis Elevator announces new contracts for sustainable building projects
Wins reinforce Otis’ position as leader in energy-efficient products.
| Oct 7, 2011
GREENBUILD 2011: UL Environment releases industry-wide sustainability requirements for doors
ASSA ABLOY Trio-E door is the first to be certified to these sustainability requirements.
| Oct 7, 2011
GREENBUILD 2011: UL Environment clarifies emerging environmental product declaration field
White paper defines EPD, details development process, and identifies emerging trends for manufacturers, architects, designers, and buyers.
| Oct 7, 2011
GREENBUILD 2011: Otis Elevator introduces energy-efficient escalator
The energy-efficient NCE escalator from Otis offers customers substantial “green” benefits.
| Oct 7, 2011
GREENBUILD 2011: Schools program receives grant to track student conservation results
To track results, schools will use the newly developed Sustainability Dashboard, a unique web-based service that makes tracking sustainability initiatives affordable and easy.


