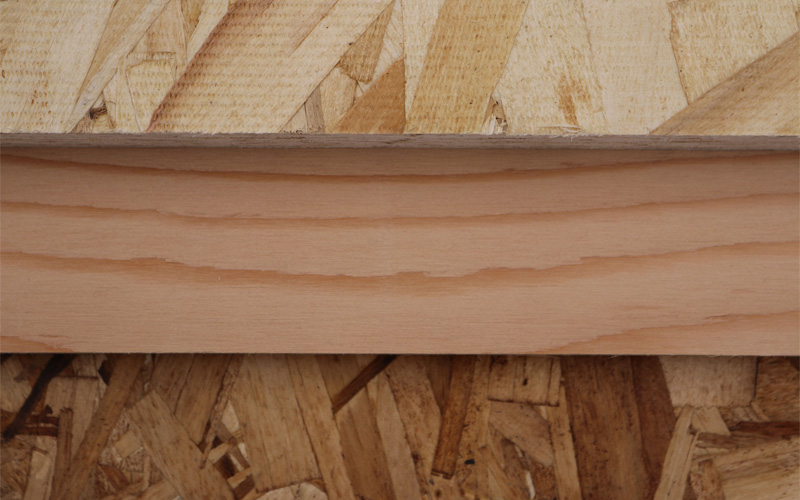
Buckling of wood structural panel sheathing such as plywood or oriented strand board (OSB) occasionally results when increased moisture conditions cause the wood to expand. Such buckling may occur between supports or between nails along supports. Although structural properties are unaffected, the waviness affects the building’s appearance and may lead to complaints. Builders and designers can significantly reduce the potential for buckling by ensuring minimal moisture-content increase and/or providing for its natural effects.
The Mechanism of Buckling
All wood-based products absorb moisture from — or give up moisture to — the environment until they reach a moisture content in equilibrium with their surroundings. This results in swelling or shrinking of the wood. For solid wood, this expansion is 20 to 40 times as great across the grain as along it. Structural panels have good dimensional stability because the tendency of individual veneers or strands to swell or shrink crosswise is greatly restricted by the adjacent veneers or strands.
In typical sheathing applications, relative humidity might vary between 40% and 80%, with corresponding equilibrium moisture content of the panels between 6% and 14%. Total dimensional change of an unrestrained 48-inch x 96-inch panel exposed to this range of conditions typically averages 1/8 inch in width or length. If the panel gets wet, dimensional change could be slightly more significant. Fasteners and framing partially restrain dimensional changes in installed panels.
The tendency of expansion to cause buckling in structural panels is related to mechanical and physical properties, and the natural characteristics of wood. It is also a function of not spacing panel ends and edges to allow for expansion. Panel stiffness relative to span length is important. For a given span, a thin panel tends to buckle upon expansion more than a thicker panel. Physical properties and characteristics of the panel include the natural growth variability of wood, moisture absorption rate of the wood, and panel variables such as species and orientation of veneers or strands. Builders can help prevent high moisture conditions by providing adequate ventilation and minimize the effects of moisture by using recommended panel joint spacing and appropriate fastening.
Design and Construction Techniques That Reduce Risk
Moisture Control
The first step in preventing moisture-related delays is to provide adequate moisture control. Ventilation requirements for attics and roof structural spaces, as well as crawl spaces, are covered in the building codes. In the 2024 International Building Code (IBC) Section 1202.2, the minimum net free ventilating area is required to be 1/150th of the area of the space ventilated, except that the ventilation may be reduced from 1/150th to 1/300th if both of the following conditions are met:
1. In climate zones 6, 7 and 8, a Class I or II vapor retarder is installed on the warm-in-winter side of the ceiling.
2. At least 40% and not more than 50% of the required venting area is provided by ventilators located in the upper portion of the attic or rafter space. Upper ventilators shall be located not more than 3 feet below the ridge or highest point of the space, measured vertically, with the balance of the ventilation provided by eave or cornice vents.
Find more details in APA’s Technical Note: Condensation Causes and Control, Form X485.
Panel Installation
Sheathing panels require aligned, level framing for a nailing surface. Any misalignment between adjacent framing will cause the panel to bend, resulting in a wavy appearance. Many reported claims of panel buckling have been traced to misaligned trusses, rafters or wall framing.
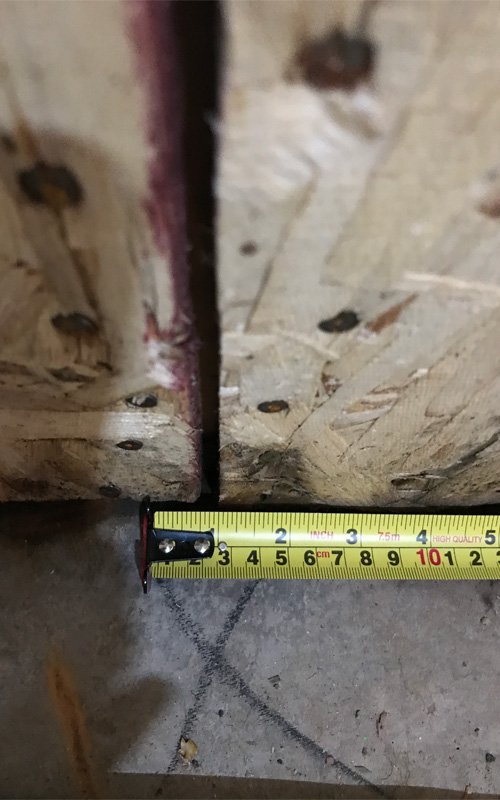
End and edge joints must be properly spaced during sheathing installation. No matter what steps are taken to protect or seal panel faces and edges, panels will expand or shrink slightly with changes in moisture content. If expansion is prevented by tightly butted joints, the resulting compression of the panel could lead to buckling. Spacing of 1/8 inch is recommended at all panel edges and ends or as required by the panel manufacturer.
While not required by code, spacer-type clips can assist in obtaining proper edge spacing and maintaining the alignment of roof sheathing. Close attention should be paid to proper nail size and spacing, ensuring fasteners do not miss the supports. Fasteners should be as close as possible to 3/8 inch from panel ends and edges. For ordinary sheathing applications, nail spacings of 6 inches on center at all supported edges and 12 inches o.c. at intermediate supports have been found adequate to hold panels flat under most conditions.
Structural panel sheathing should be protected from direct moisture before and after installation. Cover roof sheathing with roofing membrane or shingle underlayment (ASTM D226 Type 1, ASTM D4869 Type 1, ASTM D6757 or ASTM D1970) as soon as possible to minimize roof sheathing exposure to weather, unless otherwise recommended by the sheathing manufacturer. Further equilibration with surrounding air is desirable before the application of the roof covering (consult roofing manufacturer’s recommendations).
Special Considerations for Designers

Designers should note that when these factors are present, additional techniques should be considered to help ensure best performance: Shear wall or diaphragm applications with edge nail spacing 4 inches o.c. or closer, and panels applied parallel to supports.
- Shear wall or diaphragm applications with edge nail spacing 4 inches o.c. or closer, and panels applied parallel to supports.
- Use of three-ply plywood panels with face grain parallel to supports (i.e., walls).
- Use of oversized panels, such as 8 feet x 8 feet panels in panelized roof applications.
Special Considerations for Contractors
Contractors should keep in mind factors that may impact performance, such as:
- Panels installed within a few days of their manufacture.
- Extended rainy weather where panels may become saturated with water.
These applications can have a high buckling risk because the conditions may reduce the standard panel edge gap’s effectiveness in absorbing the panel expansion. This is because:
- The increased nailing schedule in some diaphragms and shear walls may prevent any panel expansion.
- Low panel stiffness in spans between the supports can lead to buckling from relatively low moisture-induced axial loads.
- An oversize panel dimension allows panel expansion to build up.
- To facilitate proper gluing, all panels are very dry at the time of manufacture — a condition that can lead to higher-than-expected expansion after the panels are in place.
- During long periods of wet weather, panels may pick up more moisture than anticipated by the normal 1/8-inch spacing recommendation.
For these applications, the following techniques can help prevent buckling:

Panel Conditioning: An important step is to condition the sheathing panels to the building environment before installation. Including this step could reduce the amount of additional moisture absorption after panels are installed, reducing dimensional expansion between installation and end-use conditions, reducing potential buckling.
Panel Edge Spacing: Additional attention to edge spacing may be required. For newly manufactured panels, if the panels were not acclimated before installation, a 1/8-inch gap at edges and ends may be insufficient.
Panel Nailing: For many design applications, choosing a thicker panel with wider nail spacing can reduce the likelihood of panel bucking — without sacrificing structural capacity. In applications where high-density nailing schedules are unavoidable, such as some highly loaded diaphragms and shear walls, simple edge gapping may not be effective. To allow for the expansion of more densely nailed panels (nail spacing 4 inches o.c. or closer) and for panels subject to total jobsite water saturation, the following nailing sequence should be considered:
- Temporarily nail panels with a nail spacing of 12- or 24-inches on center at ends, edges, and intermediate supports (rather than at the closer, specified shear wall or diaphragm schedule) during the framing phase of construction. For this initial nailing, use the nail size specified.
- After the panels acclimate to jobsite moisture conditions and before covering with siding or roofing, complete the final nailing. Be aware that when the spaces between the panels close as the panels become acclimated, finish roofing materials installed too early in the moisture-absorption process may buckle upward over the closing panel-joint spaces. Waiting until the panels have absorbed the moisture will minimize the potential for shingle ridging or buckling over panel joints.
Correcting Panel Buckling
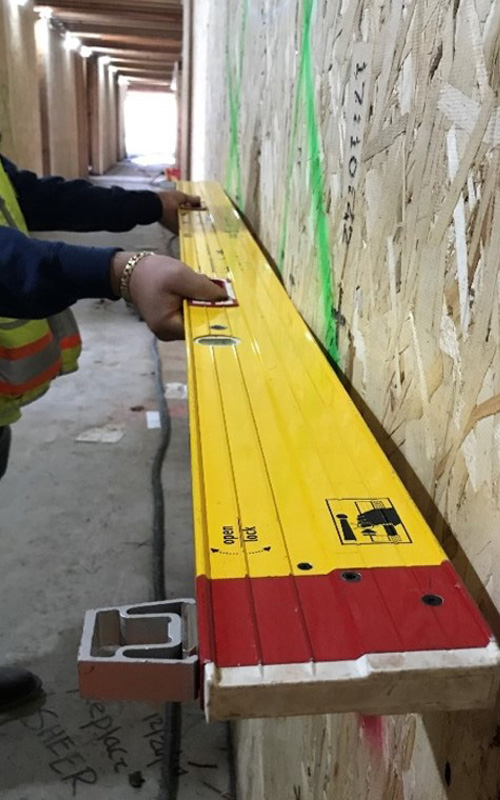
Panel bucking is a function of panel moisture content change. Contractors should ensure panels are dry (19% moisture content or less, per code) before proceeding with corrective measures. Suggestions for repairing roof shingle buckling are available from shingle manufacturers or the Asphalt Roofing Manufacturers Association. Otherwise, if buckling has occurred, ensure that the waviness was not caused by poor alignment or warping of framing members. Misaligned roof or wall framing makes the sheathing appear wavy as if it has buckled. Check for proper alignment by using a taut line or straightedge. Also, verify that the panels are properly fastened to the framing.
If panel buckling has occurred, attempt to identify and correct the cause of increased moisture. If portions of the panel need to be replaced, in some cases, partial panel replacement may be appropriate. Once corrected, buckling should not happen again. However, if buckling occurs after roofing installation and after the building is occupied, excessive moisture from within or inadequate ventilation should be suspected and corrected.
More information on reducing wood structural panel buckling is available in APA’s Technical Note: Minimizing Buckling of Wood Structural Panels, Form D481, available as a free download. Have a specific question? APA Engineered Wood Specialists are located throughout the U.S. and available to answer your inquiries. Contact your local specialist.


